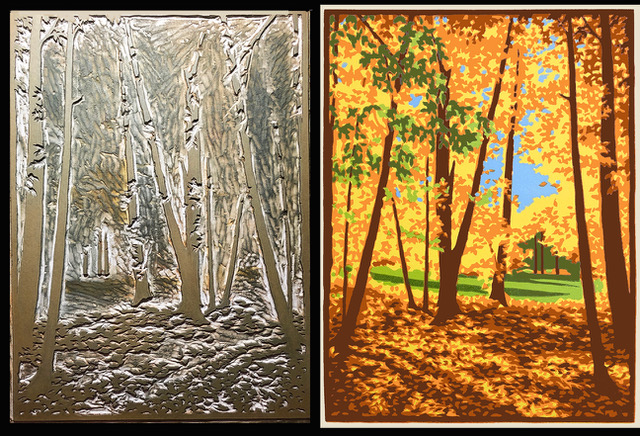
A couple of years ago, while staying at our country house in Vermont, I took a walk down our dirt road on a dazzling autumn day, and trespassed into a neighbor’s woods. I took this photo looking out into a clearing.
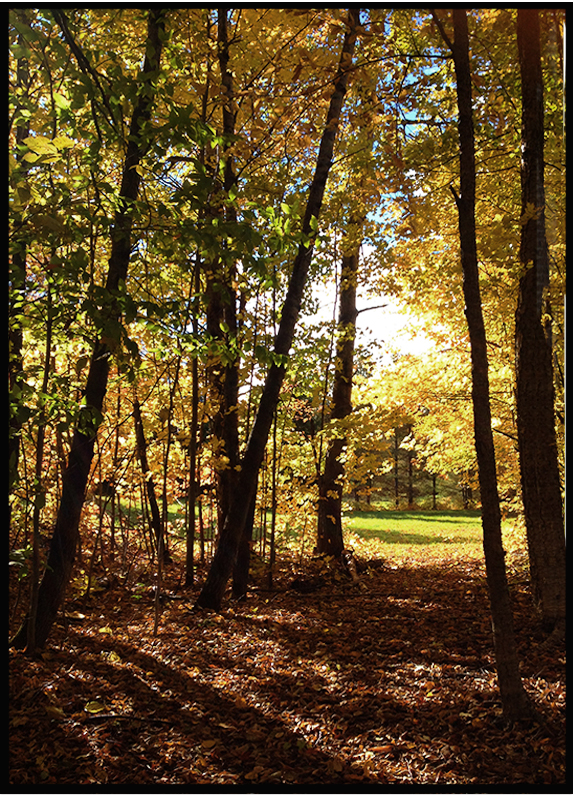
This photo became the basis for my oil painting, “Autumn Clearing,” and now I’m going to make a block print of it.
-
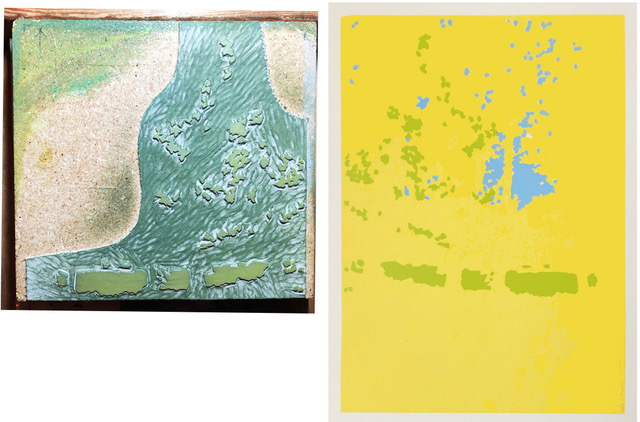
My first carving and first printing of yellow, making a total of about 240 prints. Knowing a lot of prints would be imperfect, I was hoping to end up with 150-200 perfect prints by the end.
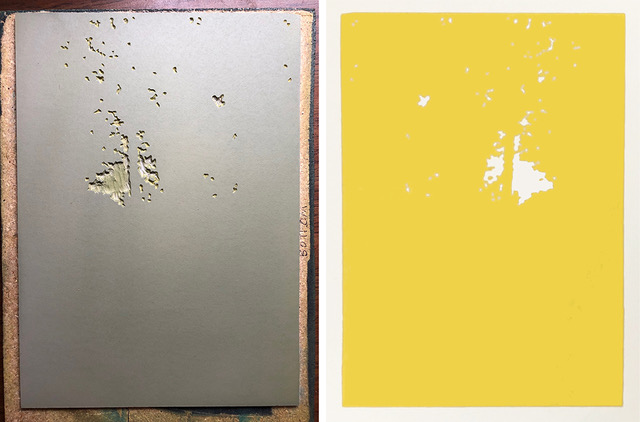
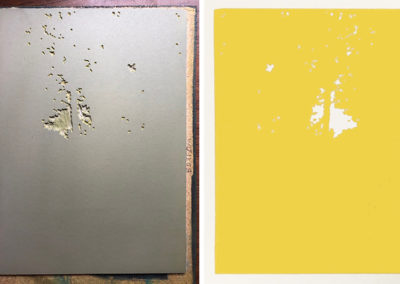
1 I figure this print will need 8 colors. To start with the first, lightest color–yellow, I cut and mount my linoleum onto wood, and carve away only the sky shapes. Yellow will work fine under all the other colors. Then it’s off to the printing studio at the Flower City Arts Center, where I mix up a big puddle of yellow ink, grab my stack of 240 sheets of paper, put the carving on the press, and start printing. I’ve hired Jeremy Bielawski, videographer, to document the whole process of making this edition of prints. No pressure there. Here’s a clip of me yakking while making those yellow prints: https://laurawilder.com/web_video/LW_Printing1.mp4
Next, I need to print sky blue in all those little white areas. So I trace them and transfer those shapes onto another piece of linoleum, and carve away everything around them. Here’s a clip of the carving process:
https://laurawilder.com/web_video/LW_Carving1.mp4
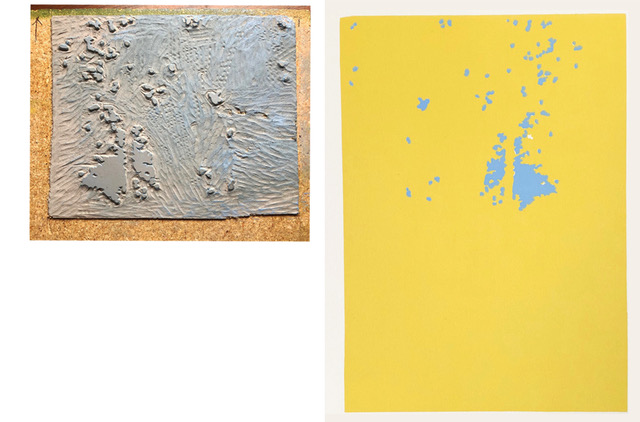
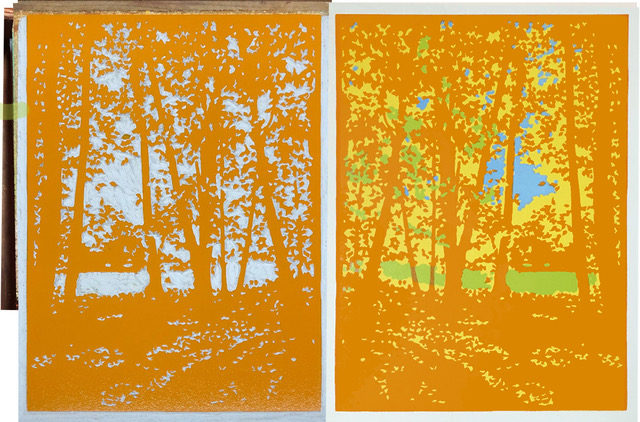
2 With block two now carved, I mix up sky blue ink and pray that the shapes I’ve carved fit like puzzle pieces into the white shapes on my yellow prints. Yay, they do! Here’s a goofy fast-motion video of me printing blue: https://www.dropbox.com/s/r6jikbylw35v7sc/LW%20Clip%20Nov%2018.mp4?dl=0 This video makes the process look so speedy-quick and easy. It usually takes me about 3-5 hours to do a printing of 200+ prints.
3 Light yellow-green is laid down next with the third carving. Once I have the design of a carving figured out, the actual carving is easy. It usually takes between 3 and 9 hours to do a carving, depending of course on the amount of detail. This one was closer to 3 hours.
4 For the 4th printing, Jeremy the videographer and I have a date to meet at the printing studio at 7pm, and I’m cramming to be ready in time. This carving is a beast, and bending over a desk carving for 8-9 hours is hell on the neck. But oh boy, in the end, the prints are looking great.
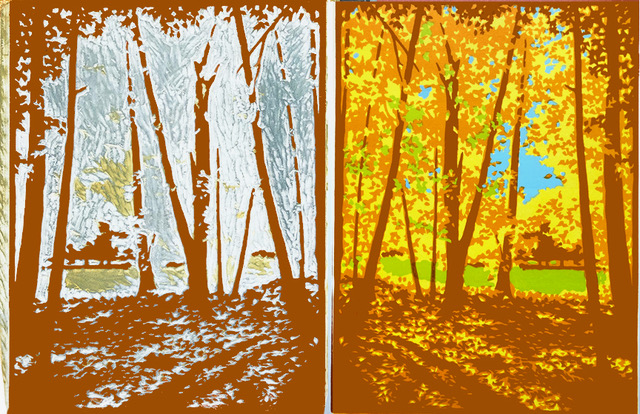
5 Until now I’ve used a new piece of linoleum for each carving. But for the next color, I can take the previous carving and just cut away all the shapes that I want to stay orange, and keep the shapes that should print rusty brown. Reusing the same block for multiple colors is called reduction printing, because each time you’re reducing the amount left uncarved. But because you are eliminating parts of the previous carving, there’s no turning back to re-do that printing, if you discover a mistake. For that reason reduction printing is sometimes called suicide printing. 🙂
6 For dark green, I carve a new block. As the layers progress, accurate registration becomes increasingly difficult. You always mess up a few prints at the beginning of each printing, and this time, I lose quite a few in the process of making micro-tweaks to the position of the block and the paper, to get those leaves and shadows to land in precisely the right spot. But I really like how they add dimension to the image.
7 Back again to the reduction block–the one I used for orange and rusty brown. Now I cut away all the shapes I want to remain rusty brown, and print dark brown. In general, you go from light colors to dark. I did have crazy visions of printing black early on for an experiment with transparent inks printed on top of it, but I eventually chickened out. Maybe another time, when I’m not being videotaped!
As I am doing this printing, I immediately realize that it is brighter than I want in the upper areas. Rats. I’m going to have to do an extra carving and printing to make the tree canopy more dense. I want it to feel like a cozy shelter under those trees.
8 So I carve a bunch more leaves and mix up ink to match that previous rusty brown color. Phew, much better. Almost done…
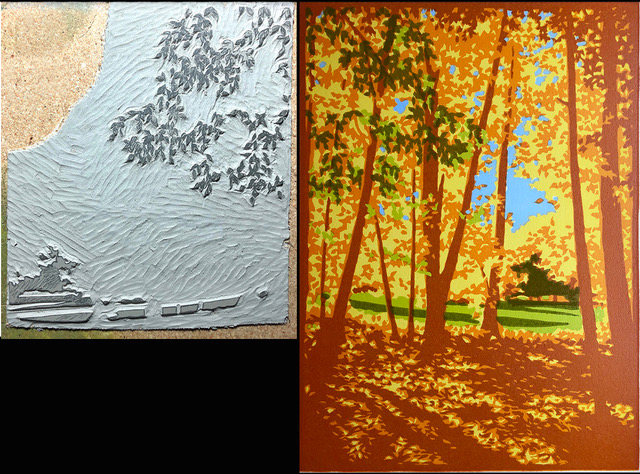
9 And I get to use that reduction block for a 4th time. I don’t want the tree trunks to be solid black but lighter and warmer, so I cut away a lot to reveal the brown underneath. I also carve away lots of the forest floor shadows, just leaving little bits of leaf shadows. You never know how it’s going to work until you make that first print. Sweet relief, it looks good!
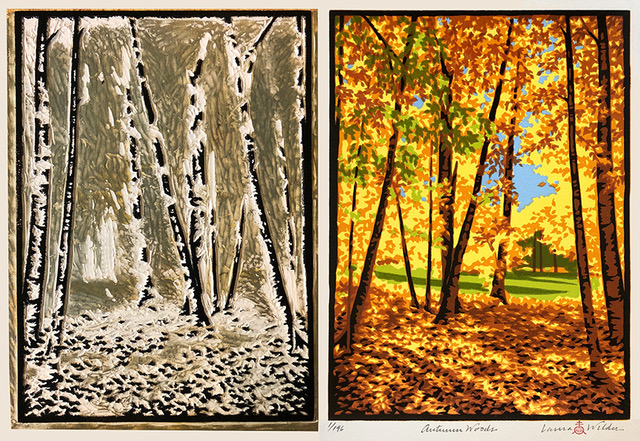
In the end, it took 2 months, with breaks to do 4 shows and the holidays, to create this edition of 196 numbered prints. For me, that’s an excellent percentage of the original 240 sheets. Maybe I’m getting the hang of this! And I’ve probably just jinxed the next project…
See “Autumn Woods” in my online store!
Stay tuned for the “Making Autumn Woods” video, hopefully this Spring!
This process is amazing Laura. Such talent!
The patience, precision, practice and passion this process takes produces pain in my poor brain. I am in awe.
LOL, thanks, Dave! (It actually strains my brain too)